On this page
- What you need
- Install the plugin
- Make an EmDash contact form
- Step 1: make a delivery
- Step 2: connect the form
- Step 3: check that it works
- Read the delivery log
- Stop spam
- When an enquiry cannot be delivered
- Enquiries from a form no delivery takes
- Send enquiries to HubSpot or another app
- Settings for the whole site
- What it does not do
- If something goes wrong
Lead Delivery is free, and you don’t need an account.
EmDash’s official Forms plugin can already email each enquiry to several addresses (or send a daily digest instead), send the visitor an automatic reply and post each enquiry to one web address. But its form editor has none of these settings: they are set through its API, and a failed email or post is only noted in the server log. Lead Delivery adds the settings in the admin, a log your client can read, retries, an email when something fails, spam and repeat marks, HubSpot, and signed requests for Zapier, Make or n8n.
Coming from WordPress?
This replaces Contact Form 7, WPForms or Gravity Forms with their HubSpot and Zapier add-ons, plus Flamingo and an email log.
- You build the form in EmDash’s official Forms plugin. Lead Delivery only sends what it collects.
- A delivery is one form and where its enquiries go, much like a notification or a feed on a WordPress form. One form can have several.
- Every enquiry is kept twice: in Forms → Submissions and in Lead Delivery’s own log.
- A failed enquiry is tried again, and someone gets an email about it.
- Connecting a form is a one-off job for whoever looks after the site’s code. EmDash’s form editor has no “send to” setting yet. The same goes for the forms plugin’s own notification emails: they are set through its API, not in the form editor.
What you need
- EmDash 1.3 or newer.
- The official forms plugin, version 0.2.11 or newer. Older versions save a ticked single checkbox, such as a consent box, as unticked.
- Email set up in EmDash, if you want enquiries by email. Installed from the registry, sending email needs EmDash 1.4.0 or newer.
- Scheduled tasks running: they send the enquiries, the retries and the alerts. On Cloudflare that is a Cron Trigger every minute, which the EmDash templates have.
Install the plugin
Lead Delivery is on the EmDash registry. Open Registry in your EmDash admin and install Lead Delivery; the site needs a sandbox runner, which on Cloudflare means Workers Paid. Or ask whoever looks after your site’s code to add it next to the forms plugin:
npm install @moorage/plugin-lead-delivery// astro.config.mjs
import { formsPlugin } from "@emdash-cms/plugin-forms";
import leadDelivery from "@moorage/plugin-lead-delivery";
emdash({
plugins: [formsPlugin(), leadDelivery],
});Under plugins, as above, is the simplest. It also works under sandboxed (version 0.4.0 or newer), which is how the registry runs it.
The rest happens in the admin.
Make an EmDash contact form
- In the sidebar, open Marketing, then Forms, and press New Form.
- Type Contact in Name. The Slug, the form’s short name, fills itself in as
contact. - Press Add Field. Type Your name in Label and leave Type as text.
- Add a second field with the label Email and the type email.
- Add a third field with the label Message and the type textarea.
- Press Create Form.
To show the form on a page:
- Open the page or post where it belongs.
- In the text, type
/formand press Enter. - Choose Contact and press Insert.
- Press Save, then Publish now, and Publish now again in the box.
Step 1: make a delivery
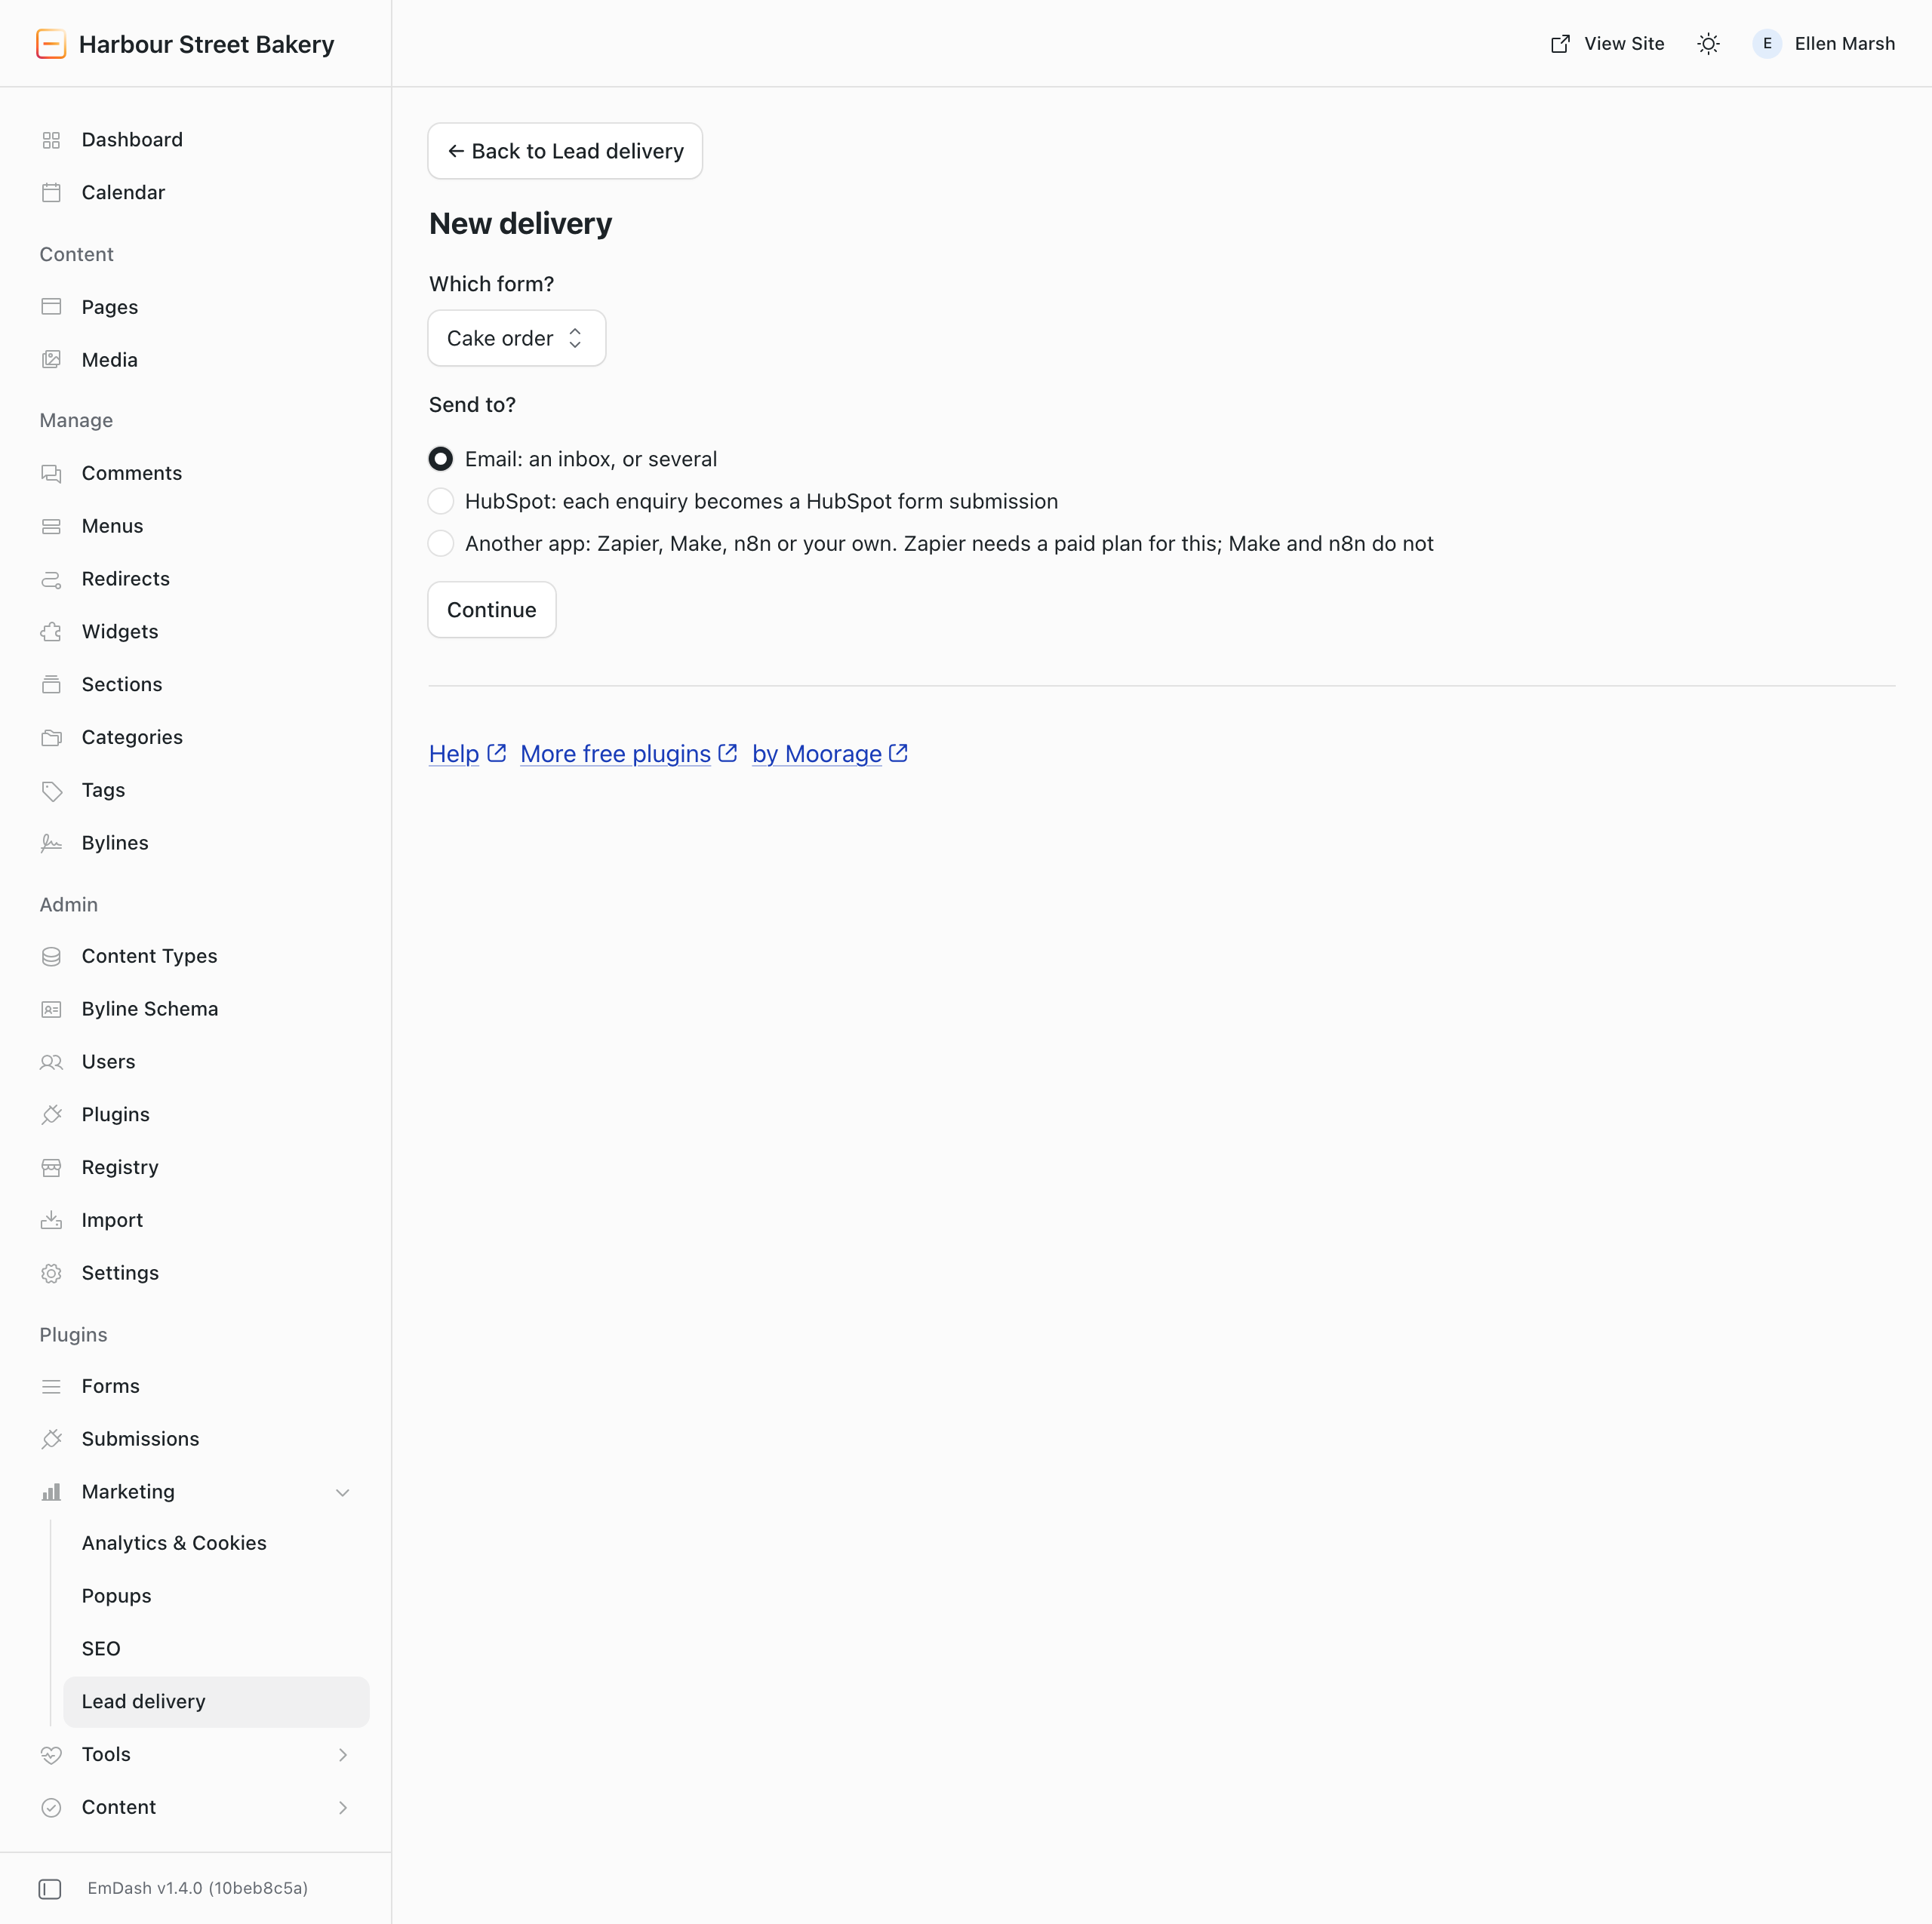
A delivery is one form and where its enquiries go. Lead Delivery names it for you, for example “Contact form → Shop inbox”.
- Open Lead delivery, under Marketing in the sidebar.
- Press + New delivery.
- Under Which form?, choose your form. The first time, Which form? shows Another form; type the short name,
contact, in the box under it, Its short name (the Slug column in Forms). - Under Send to?, choose Email: an inbox, or several.
- Press Continue.
- In Send each enquiry to, type one or more addresses, separated by commas. Your own address is already there.
- Leave the name in Name (only admins see it), or change it.
- Press Save and send a test.
A message at the top says the delivery was saved, its name, and how the test went. The first address gets each enquiry, and the others get a copy. Pressing Reply answers the person who filled in the form.
Step 2: connect the form
If the form has never been connected, Connect this form opens next. EmDash’s form editor cannot yet hand enquiries to another plugin, so someone who looks after the site’s code does it once for each form. The page says it takes about five minutes.
- Read Instructions for your web person. They are written for your site and this form.
- Copy them, or type your web person’s address in Email these instructions to and press Email instructions.
- When they have done it, press I have done this. The delivery then asks you to send yourself an enquiry through the form.
Not ready yet? Press Skip for now. The delivery’s page then says “Not sending yet: … is not connected”, with a Connect this form button, until the form is connected.
The instructions use one of two ways. Lead Delivery checks once which one works on your site.
- Straight from the form. The form sends each enquiry to a private web address. On Cloudflare this needs the compatibility flag
global_fetch_strictly_publicinwrangler.jsonc. - Through the form’s email. The form’s notification goes to a private address ending in
@lead-delivery.invalid. Lead Delivery takes the enquiry from that email and cancels it, so nobody receives it and nothing leaves the site.
The email way needs email set up and the form’s daily digest off. It sees field labels, not field names, and leaves out hidden fields such as UTM values. A message with lines like “Price: 20” can be split wrongly. Use the straight way if your site allows it.
Your web person does this once for each form:
- Under Settings → API Tokens, press Create Token, give it a name, tick Admin and press Create Token. Copy the token: it is shown once.
- Find the form’s ID with the
forms/listaddress from the instructions. - Send the
forms/updaterequest from the instructions.
Careful: in the email way, that request replaces the list of notification addresses. Any address already there must be sent again with the new one.
{"id":"FORM_ID","settings":{"notifyEmails":["enquiries-…@lead-delivery.invalid","you@yourshop.com"],"digestEnabled":false}}Step 3: check that it works
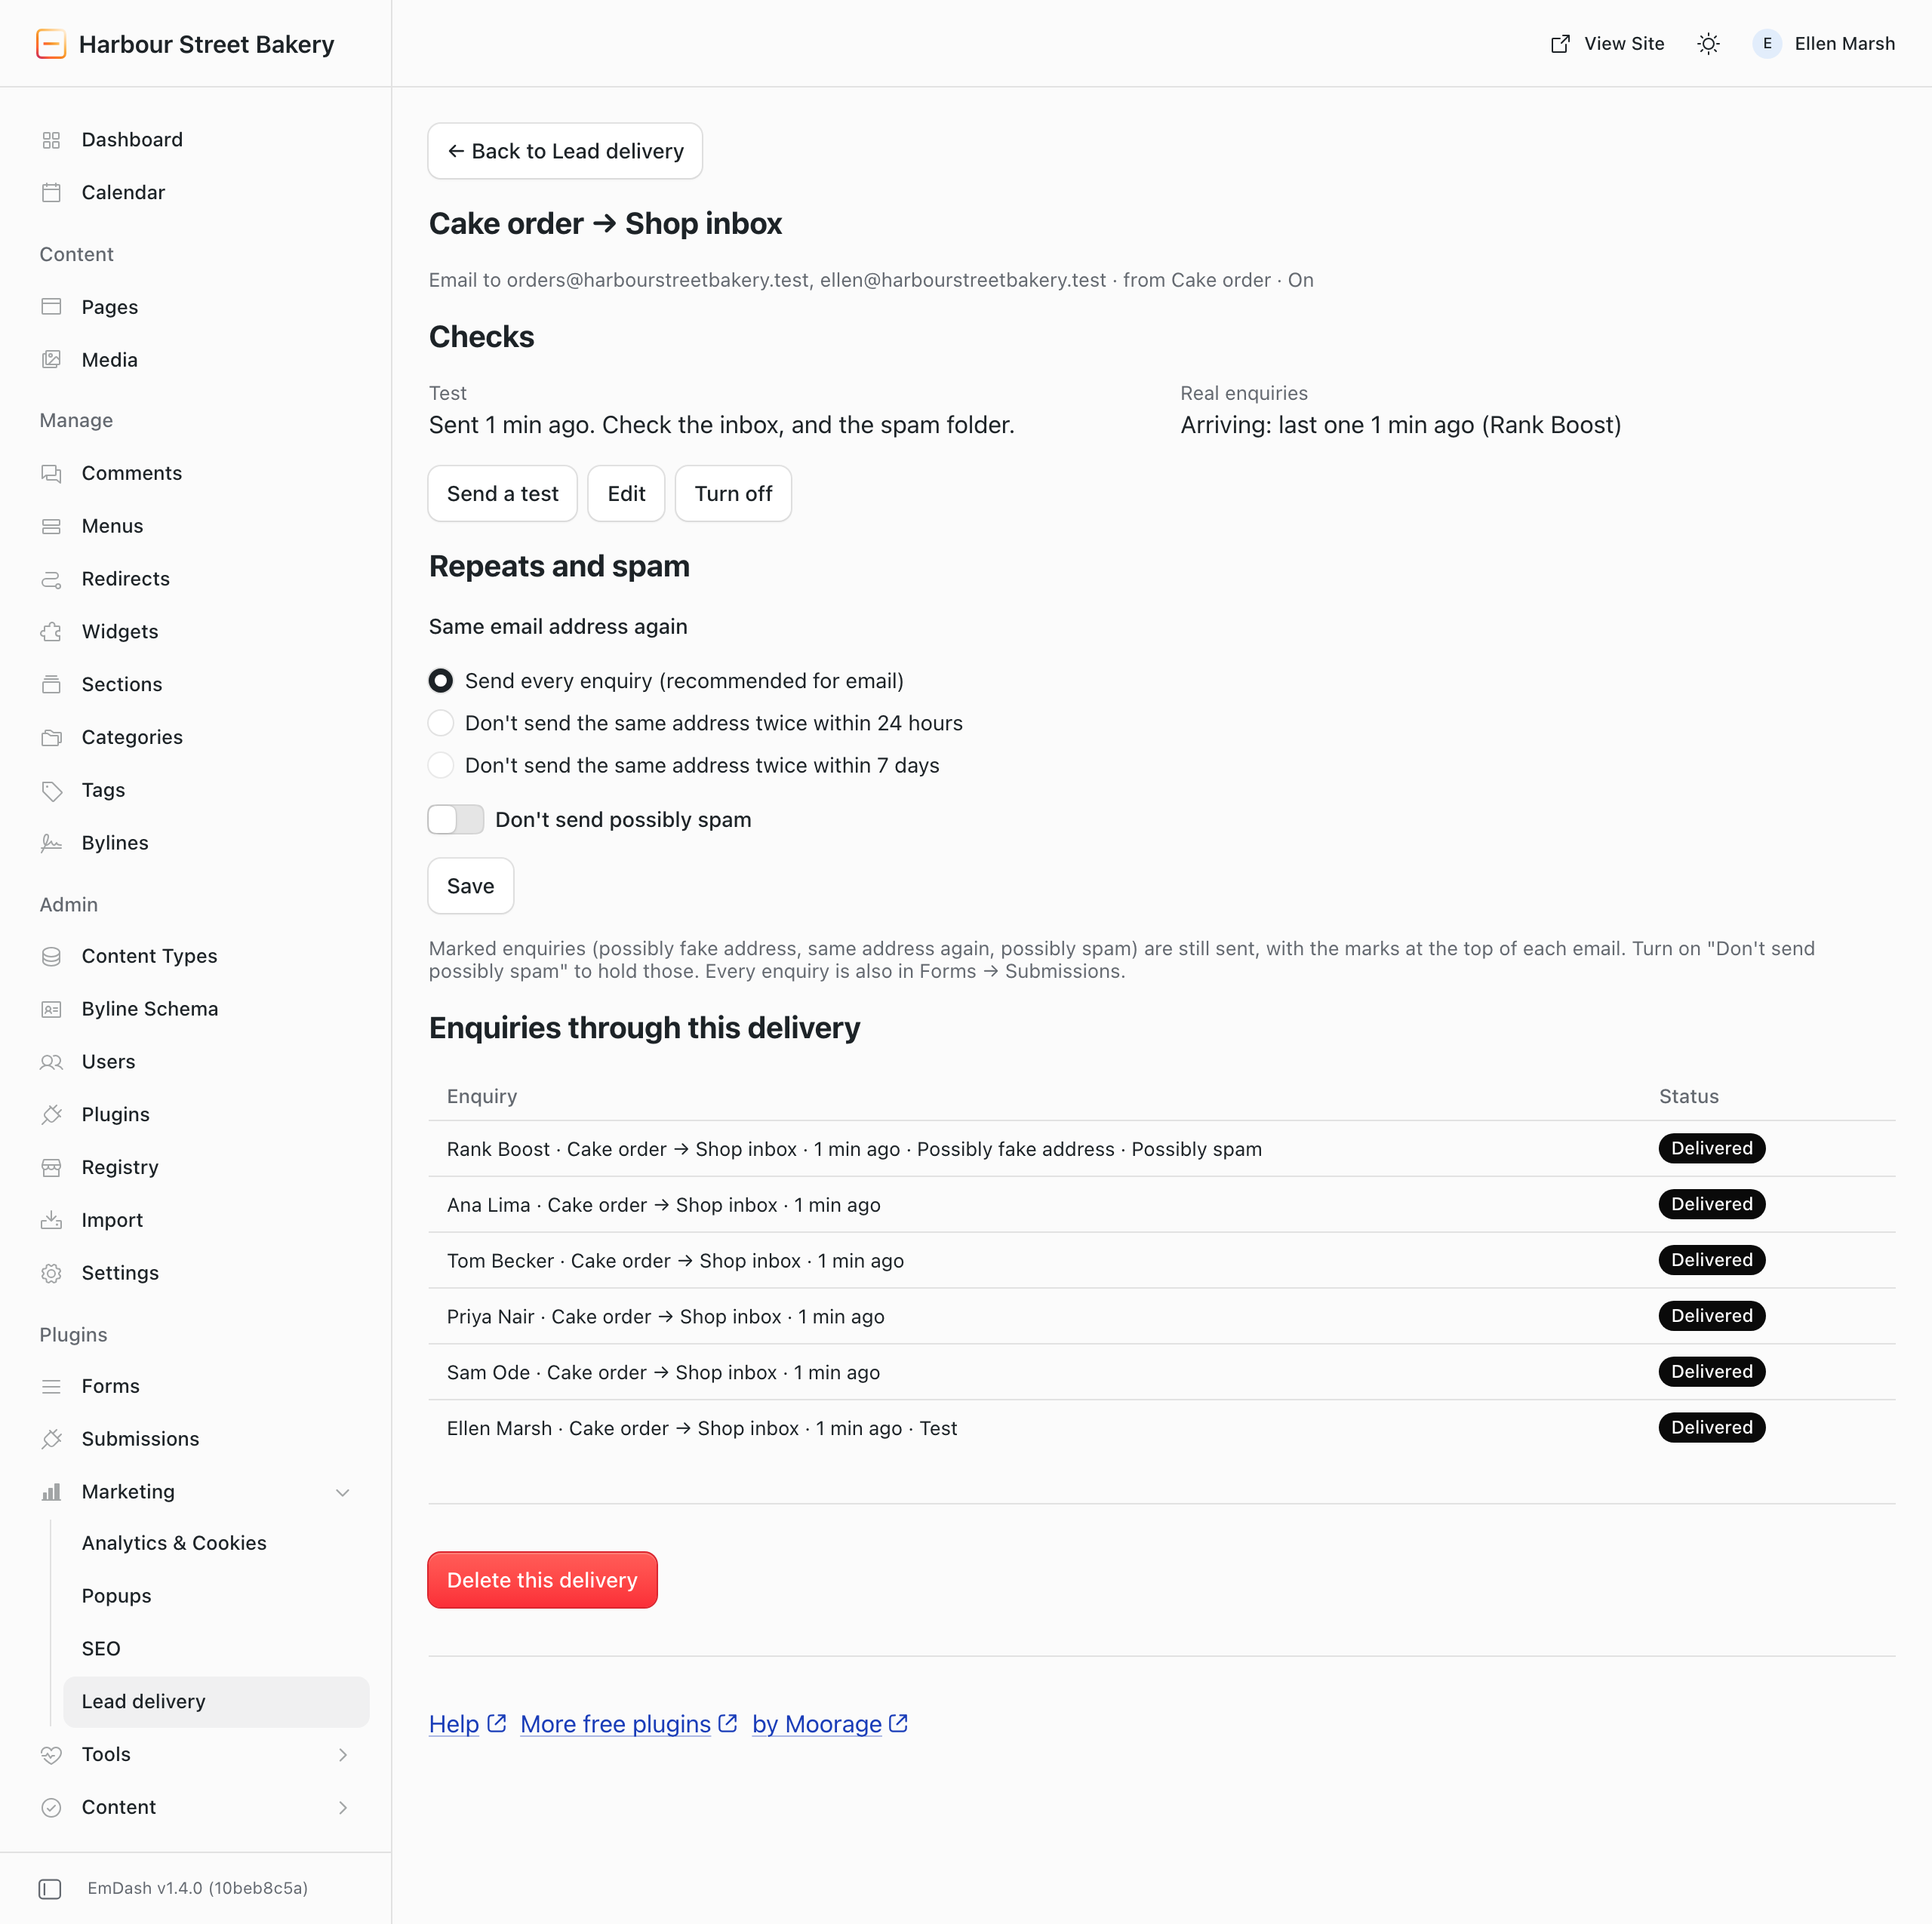
- On the Lead delivery page, press Open on your delivery’s row.
- Look under Checks. Test says whether the test was sent. For email it adds: check the inbox, and the spam folder.
- Fill in the real form on your site, as a visitor would. Lead Delivery sends each enquiry with its every-minute run, so it arrives within about a minute.
- A minute later, open the delivery again. Real enquiries now says “Arriving”, with the time and name of the last one.
Need another test later? Press Send a test on the delivery’s page.
Read the delivery log
The Lead delivery page starts with four counters: Received, Delivered, Trying again and Needs fixing. Below them are your deliveries, each with its status, then Latest enquiries and See all enquiries. Each enquiry shows who sent it, through which delivery, when, and how it went.
Editors, usually your client, see the counters, the deliveries and the log. Their button on each delivery is Enquiries, and they can press Send again. Only admins add or change deliveries.
A delivery’s page also has Edit (its name, addresses, which forms it takes, on or off), Turn off and, at the bottom, Delete this delivery.
Stop spam
Lead Delivery marks enquiries that look wrong: Possibly fake address (a short-lived inbox), Same address (with how long ago it last wrote) and Possibly spam (three or more links, a known sales pitch such as “SEO services”, a message that is only a link, or a link in the name). Marks are a guess, so a marked enquiry is still sent. The marks are listed at the top of each delivered email.
To hold some back, open the delivery and go to Repeats and spam.
- Under Same email address again, choose Send every enquiry (recommended for email), Don’t send the same address twice within 24 hours or Don’t send the same address twice within 7 days.
- Turn on Don’t send possibly spam to hold enquiries marked possibly spam.
- Press Save.
A held enquiry is listed as Not sent, with the reason. Send again sends it, and it is still in Forms → Submissions.
Lead Delivery does not stop spam reaching the form. To stop bots at the form itself, turn on Turnstile in the form’s settings under Forms. A form with Turnstile cannot go in a popup yet.
When an enquiry cannot be delivered
If a delivery does not answer, the enquiry shows Trying again, with “try 2 of 8” and the time of the next try. It is tried 8 times over about two days. Send now tries at once.
If a service refuses an enquiry for a reason that would fail again, it is not retried. The delivery shows Needs fixing, and a red notice at the top says in plain words what to fix, with the service’s own words beneath. Fix the address or the app, then press Send again.
The people under Who hears when something needs fixing get an email. Its subject starts with your site’s name, and each kind goes out at most once a day: an enquiry could not be delivered, a form that usually gets enquiries has had none for 3 days, or scheduled tasks are not running.
Enquiries from a form no delivery takes
They are kept and listed as Not sent, and a banner says so, for example “2 enquiries from Contact us were not sent: no delivery takes this form”. Press the button under it to add the form to a delivery; they are then sent within about a minute. This can happen when the form’s email names the form differently from the short name you typed.
A delivery that has received nothing may also ask “Enquiries arrived from Contact us instead: is that the one?”
Send enquiries to HubSpot or another app
We haven’t tried these with a real HubSpot account or a real app. The plugin’s notes say:
- Under Send to?, choose HubSpot and paste the HubSpot form’s share link or embed code. No HubSpot key is stored. Each enquiry becomes a HubSpot form submission, so your HubSpot workflows run.
- Obvious form fields are matched to HubSpot fields for you. Choose the rest from the list.
- For HubSpot the button is just Save. A test is sent only if you switch on Send a test to HubSpot now, because a test adds a contact in HubSpot.
- For Zapier, Make, n8n or your own app, choose Another app, then Which app?, and paste the address the app gave you, starting
https://. Zapier needs a paid plan for this; Make and n8n do not. - After saving an app delivery, its signing secret is shown once. Copy it for whoever set up the app, so the app can check an enquiry came from your site.
Settings for the whole site
These are folded at the bottom of the Lead delivery page, under Settings for the whole site. They open by themselves when nobody gets alerts, or when your forms have no way to hand enquiries over.
- Who hears when something needs fixing: the addresses for alerts, with your own already there.
- This site: the check of which way your forms can hand enquiries over, with Check again.
- Private address: the address only this site knows. If it has been shared by mistake, press Reset the private address. Every connected form then stops sending until it is connected again.
What it does not do
- No Mailchimp yet.
- File attachments are not sent. The log says an enquiry has one, and the file stays in Forms → Submissions.
- It does not block spam at the form. See “Stop spam” above.
- No reports, no routing rules and no syncing back from HubSpot.
If something goes wrong
- “There is no form called …” Copy the short name from the Slug column under Forms.
- The delivery says “Not sending yet”. Press Connect this form and send the instructions to your web person. Then send one enquiry.
- “The app’s address must start with https://.” Copy the address again from the app.
- Enquiries sit on Trying again for hours. Scheduled tasks may not be running. On Cloudflare, check the Worker has a Cron Trigger every minute. Send now works meanwhile.
- HubSpot refuses every enquiry. The plugin’s notes say to turn off CAPTCHA on that HubSpot form.
More about the plugin is on the Lead Delivery plugin page. To put a sign-up form in a box or popup, see How to add an EmDash popup, top bar or sign-up box.
Stuck on a step? Email hello@moorage.dev.
What should we make next?
Tell us the job you would like a plugin to do. We read every answer and use your email only to reply to it; release emails come only if you tick the box.